
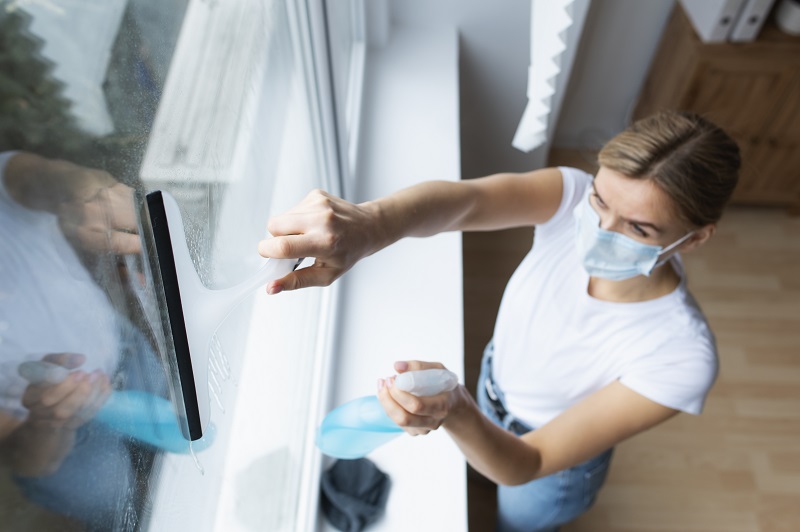
Removing old window tint can improve visibility, refresh the appearance of your windows, and prepare the glass for a new film. However, peeling tint off incorrectly can leave behind stubborn adhesive, scratches, or even damage to the glass and window defroster lines. That is why learning how to remove window tint without damage is important before starting the project.
The good news is that you do not always need expensive tools or professional equipment. With the right method, patience, and a few basic supplies, you can remove most window tint safely. This guide explains the safest methods, the tools you need, common mistakes to avoid, and how to clean the glass after removing the film.
Why Remove Old Window Tint?
Window tint does not last forever. Over time, the film can become faded, purple, bubbled, cracked, or difficult to see through. Old tint may also begin separating from the glass, creating an unattractive appearance.
You may want to remove window tint because:
- The film has become damaged or discolored.
- Bubbles have developed across the glass.
- The tint is reducing visibility.
- You want to install a newer film.
- The existing tint is too dark.
- The adhesive has started deteriorating.
- You are selling or restoring a vehicle.
- You want to update the appearance of your home or office windows.
Removing the film correctly is especially important when working with automotive rear windows because many vehicles have delicate electrical defroster lines embedded in the glass.
Can You Remove Window Tint Without Damaging the Glass?
Yes. You can remove window tint without damaging the glass if you use controlled heat, appropriate tools, and gentle pressure.
The biggest risks usually come from rushing the job or using sharp metal tools incorrectly. Excessive scraping can scratch glass, while aggressive scraping on a rear windshield can damage defroster lines.
Before starting, identify the type of window you are working on. Automotive side windows, rear windshields, residential windows, and decorative glass may require slightly different techniques.
Tools You Need
Having the right equipment makes the process easier and safer. You may need:
- Heat gun or household hair dryer
- Spray bottle
- Warm water
- Dish soap
- Microfiber cloths
- Plastic scraper or old plastic card
- Razor blade scraper for suitable glass surfaces
- Glass cleaner
- Adhesive remover
- Garbage bags or plastic sheets
- Protective gloves
- Paper towels
For automotive rear windows, prioritize plastic tools and gentle cleaning methods around the defroster lines.
How to Remove Window Tint Without Damage
Step 1: Prepare the Work Area
Before removing the film, clean the surrounding area and make sure you have enough space to work comfortably. If you are working on a vehicle, park it somewhere with good ventilation and moderate temperatures.
Avoid attempting the job on extremely cold glass because the film may become brittle and harder to remove. Extremely hot conditions can also make adhesive messy.
Protect nearby surfaces from adhesive residue by placing towels or plastic sheets underneath the work area.
Step 2: Warm the Window Tint
Heat is one of the most effective ways to loosen window tint adhesive.
Use a household hair dryer or heat gun on a low or moderate setting. Hold it several inches away from the glass and move it continuously rather than concentrating heat on one spot.
Warm a small section of the film for several seconds. The goal is to soften the adhesive rather than overheat the glass.
A hair dryer is usually easier for beginners because it produces less intense heat. If you use a heat gun, be especially careful because excessive heat can damage surrounding materials.
Step 3: Lift a Corner
Once the film becomes warm, carefully try to lift a corner.
Use your fingernail or a plastic scraper to start the edge. Avoid forcing a razor blade aggressively into the film.
Once you have enough film lifted to grip it, slowly pull it away from the glass.
The key is to work gradually. If the film begins tearing, stop and apply more heat.
Step 4: Peel the Film Slowly
Pull the tint away from the glass at a shallow angle rather than pulling it straight outward.
Slow peeling helps keep more adhesive attached to the film instead of leaving it on the window.
If the film becomes difficult to remove, warm the area again. Do not pull harder simply because the tint appears stuck.
A slow process may take longer, but it significantly reduces the possibility of leaving large amounts of adhesive behind.
The Steaming Method
A garment steamer can be an excellent option for removing window tint. Steam provides heat and moisture that can soften the adhesive underneath the film.
Hold the steamer near the film and move it slowly across a small section. Once the adhesive softens, lift the edge and gently peel the film away.
Continue steaming as you progress.
Why Steam Works
Window tint is typically attached with pressure-sensitive adhesive. Heat and moisture can weaken the bond between the adhesive and the glass.
Steam can be particularly useful when the film is old and brittle because it helps soften both the film and adhesive.
However, do not hold the steamer in one place for an extended period. Controlled movement is essential.
Removing Tint With Soap and Water
For some windows, warm soapy water can help loosen adhesive and make cleanup easier.
Mix warm water with a small amount of dish soap in a spray bottle. Spray the glass after removing the main film and allow the solution to sit for several minutes.
Then gently wipe the surface with a microfiber cloth.
This method is inexpensive and useful for removing light adhesive residue. However, very old or stubborn adhesive may require heat or a dedicated adhesive remover.
How to Remove Stubborn Adhesive
After the tint comes off, you may notice a sticky layer remaining on the glass. Do not immediately start scraping aggressively.
First, soften the adhesive.
Apply warm soapy water or an appropriate glass-safe adhesive remover. Let it sit for several minutes.
Then wipe the residue with a microfiber cloth.
For stubborn spots on ordinary glass, a suitable razor scraper can help. Keep the glass wet and use gentle, controlled strokes.
Important: Be Careful With Defroster Lines
If you are working on an automotive rear windshield, be extremely careful around the defroster lines.
These lines can be damaged by aggressive scraping. Once damaged, they may stop functioning correctly.
Avoid using a razor blade directly across the defroster lines. Instead, use heat, steam, and a plastic scraper whenever possible.
If the adhesive is particularly stubborn around these lines, consider having a professional handle the removal.
How to Clean the Glass After Tint Removal
Once all the film and adhesive have been removed, clean the entire window.
Start with a microfiber cloth and an appropriate glass cleaner. Wipe the glass in overlapping strokes to remove any remaining residue.
Inspect the window from different angles. Adhesive can be difficult to see when the glass is wet but become obvious after it dries.
If you find remaining spots, repeat the cleaning process rather than using excessive force.
Finish with a clean, dry microfiber cloth to reduce streaks and lint.
Common Mistakes to Avoid
Knowing what not to do is just as important as knowing how to remove window tint without damage.
Using Excessive Heat
Too much heat can damage surrounding trim, seals, plastics, or other components. Use moderate heat and keep the heat source moving.
Pulling the Film Too Quickly
Fast pulling can cause the film to tear into small pieces, leaving more adhesive behind.
Instead, peel slowly and apply additional heat whenever resistance increases.
Scraping Dry Glass
Scraping a dry surface increases friction and can create unnecessary scratches. Keep the surface wet when using a scraper on glass where scraping is appropriate.
Using Sharp Tools on Defroster Lines
Never aggressively scrape across rear-window defroster lines. A small mistake can damage the electrical connections.
Using Harsh Chemicals
Some strong solvents can damage rubber seals, plastics, coatings, or interior surfaces. Always check whether a product is suitable for the specific glass and surrounding materials.
Skipping the Final Cleaning
Removing the film is only part of the process. Remaining adhesive can attract dirt and make the window look cloudy.
Window Tint Removal: Heat vs. Steam
| Method | Best For | Difficulty | Main Advantage |
|---|---|---|---|
| Hair dryer | Small projects | Easy | Affordable and accessible |
| Heat gun | Strong adhesive | Moderate | Powerful heat |
| Steamer | Old or stubborn film | Moderate | Softens film and adhesive |
| Soapy water | Light residue | Easy | Cheap and simple |
| Professional removal | Difficult jobs | Easy for homeowner | Reduces risk of damage |
For most beginners, a hair dryer or steamer provides a good balance between effectiveness and control.
How Long Does Window Tint Removal Take?
The time required depends on the size of the window, age of the film, type of adhesive, and removal method.
A small side window may take around 15 to 30 minutes. Larger windows or heavily aged tint can take considerably longer.
Rear windshields may require additional time because you need to work carefully around defroster lines.
Do not rush simply to finish faster. Careful removal usually produces a cleaner result and reduces the chance of damage.
When Should You Hire a Professional?
DIY removal works well for many standard windows, but professional assistance can be worthwhile in certain situations.
Consider hiring a professional if:
- The film is extremely old and brittle.
- Adhesive is heavily bonded to the glass.
- You are working on a large number of windows.
- The glass has delicate coatings.
- You are concerned about damaging rear defroster lines.
- You do not have suitable tools.
- The window is expensive or difficult to replace.
Professional tint installers typically have specialized equipment and experience with difficult adhesive.
Tips for Safe and Damage-Free Removal
Keep these tips in mind throughout the project:
- Work slowly and patiently.
- Warm small sections rather than the entire window at once.
- Keep heat sources moving.
- Use plastic tools whenever possible.
- Avoid aggressive scraping.
- Keep suitable glass surfaces wet when scraping.
- Protect surrounding trim and interior surfaces.
- Take extra care with rear defroster lines.
- Test cleaning products on a small area first.
- Clean the glass thoroughly after removal.
These simple precautions can make a major difference in the final result.
Can You Reapply New Window Tint After Removal?
Yes, you can usually install new window tint after removing the old film and adhesive. However, the glass must be completely clean before applying a new film.
Any remaining adhesive, dirt, dust, or oily residue can create bubbles and imperfections beneath the new tint.
After cleaning, inspect the glass carefully. It should be smooth, clear, and free of visible residue.
If you are installing new automotive tint, make sure the replacement film complies with applicable local laws regarding visible light transmission.
Final Thoughts
Learning how to remove window tint without damage is mostly about using the right combination of heat, patience, and gentle pressure. Start by warming the film, carefully lift a corner, and slowly peel the tint away. If adhesive remains, soften it before cleaning rather than aggressively scraping the glass.
For standard windows, a hair dryer, steamer, plastic scraper, warm soapy water, and microfiber cloths may be enough. However, automotive rear windows require additional caution because defroster lines can be damaged by improper scraping.
The most important rule is simple: do not rush. Work in small sections, control the amount of heat, and use appropriate cleaning tools. With careful preparation and the right technique, you can remove old window tint while keeping the underlying glass clean, clear, and damage-free.
Here is a concise, SEO-friendly conclusion for your article:
Conclusion
Learning how to remove window tint without damage requires patience, gentle techniques, and the right tools. Using controlled heat or steam can soften the adhesive, making the film easier to peel without scratching the glass. Avoid aggressive scraping, excessive heat, and harsh chemicals, especially when working around automotive defroster lines. After removing the tint, thoroughly clean the glass to eliminate leftover adhesive and prepare the surface for new film. By following these careful steps, you can achieve clean, clear, damage-free windows and extend their appearance and usability.see more